
Ever walked down a busy street and seen a really colourful and interesting design on a store window? That’s the cool effect of window graphics. They are not just for stores, though. You can use custom window decals to spice up any glass area at home or work.
A study by FedEx pointed out something interesting: about 76% of folks said they walked into a shop they never visited before because the signs and graphics pulled them in. However, 68% actually bought something because a sign caught their eye. This shows just how powerful and effective great window stickers can be.
But applying graphics on the windows is not really an easy task. It requires extraordinary skills and tools. In this blog, we’re going to guide you through how to install window graphics professionally. Let’s dive in and make the most of your windows!
Table of Contents
ToggleKey Takeaways
- Proper surface preparation is essential for a bubble-free and lasting application.
- Choosing the right type of graphic for your purpose improves both functionality and aesthetics.
- Regular maintenance ensures longevity and sustained visual appeal.
Understanding Window Graphics
Graphics are more than just fancy stickers for your windows; they combine good looks with practical benefits. There are different types like vinyl window graphics, privacy window films, and frosted window films. These graphics are useful for advertising your business, decorating a space, or keeping things private.
The material you choose for your graphics affects how well they meet your needs and how long they last. For instance, using the right design tips for window graphics can really help them stand out and serve their purpose, whether that’s catching someone’s eye or just making a room look nicer.
Choosing the Right Graphics for Your Space
Picking the right graphics can really change the look and function of your windows. Here’s a simple guide to help you make the best choice:
-
Identify Your Needs
Privacy: If you want more privacy, frosted window films are great because they block the view while letting light in.
Branding: Businesses can use window decals for advertising, like showing off logos or specials.
Decor: Pick fun or beautiful designs to make any space more inviting.
-
Think About Visibility
Inside vs. Outside: Decide if your graphics should be seen from inside, outside, or both.
Lighting: Consider how different lighting will affect how the graphics look.
-
Choose the Right Material
Permanent or Removable: Decide if you need durable window films that last a long time or removable window graphics that you can change out.
Type of Adhesive: Pick between adhesive window graphics that stick right to the glass and clings that use static and don’t need glue.
-
Design Choices
Colours: Pick colours that go well with your space and are eye-catching.
Custom Designs: You can get custom window decals to fit exactly what you’re looking for.
-
Size and Place Correctly
Right Size: Measure your windows so the graphics fit perfectly.
Where to Place: Put them where they will make the most impact but won’t block important views or light.
-
Think About Upkeep
Cleaning: Choose graphics that are easy to clean.
Lasting Quality: Think about how durable they need to be, especially if they’re outside and exposed to weather.
By thinking about these things, you can pick graphics that look fantastic and work perfectly for what you need. Whether it’s for privacy, decoration, or advertising, the right graphics can make a big difference.
What You Need for Window Graphics Installation
Before you start putting up your graphics, make sure you have everything you need ready to go. Here’s a list of tools that will help you do a good job:
- Measuring Tape: You will need this to measure your window so the graphics fit perfectly.
- Marking Tools (Pencil or Chalk): Use these to mark where the graphics will go, which helps you place them straight.
- Squeegee: This tool helps smooth out the graphics and get rid of any air bubbles.
- Razor Blade or Utility Knife: You’ll use this to cut off any extra material.
- Cleaning Solution and Lint-Free Cloth: Clean the window really well before you start to help the graphics stick better.
- Application Solution (for wet application): This helps you move the graphic around a little if you need to adjust it before it sets.
- Heat Gun or Hairdryer (for vinyl applications): This heats up the vinyl, making it easier to stretch and stick without wrinkles.
Having the right tools is really important because they help you do the job smoothly and prevent mistakes like crooked placement or bubbles under the graphics. With everything on hand, you’ll be set for a successful installation.
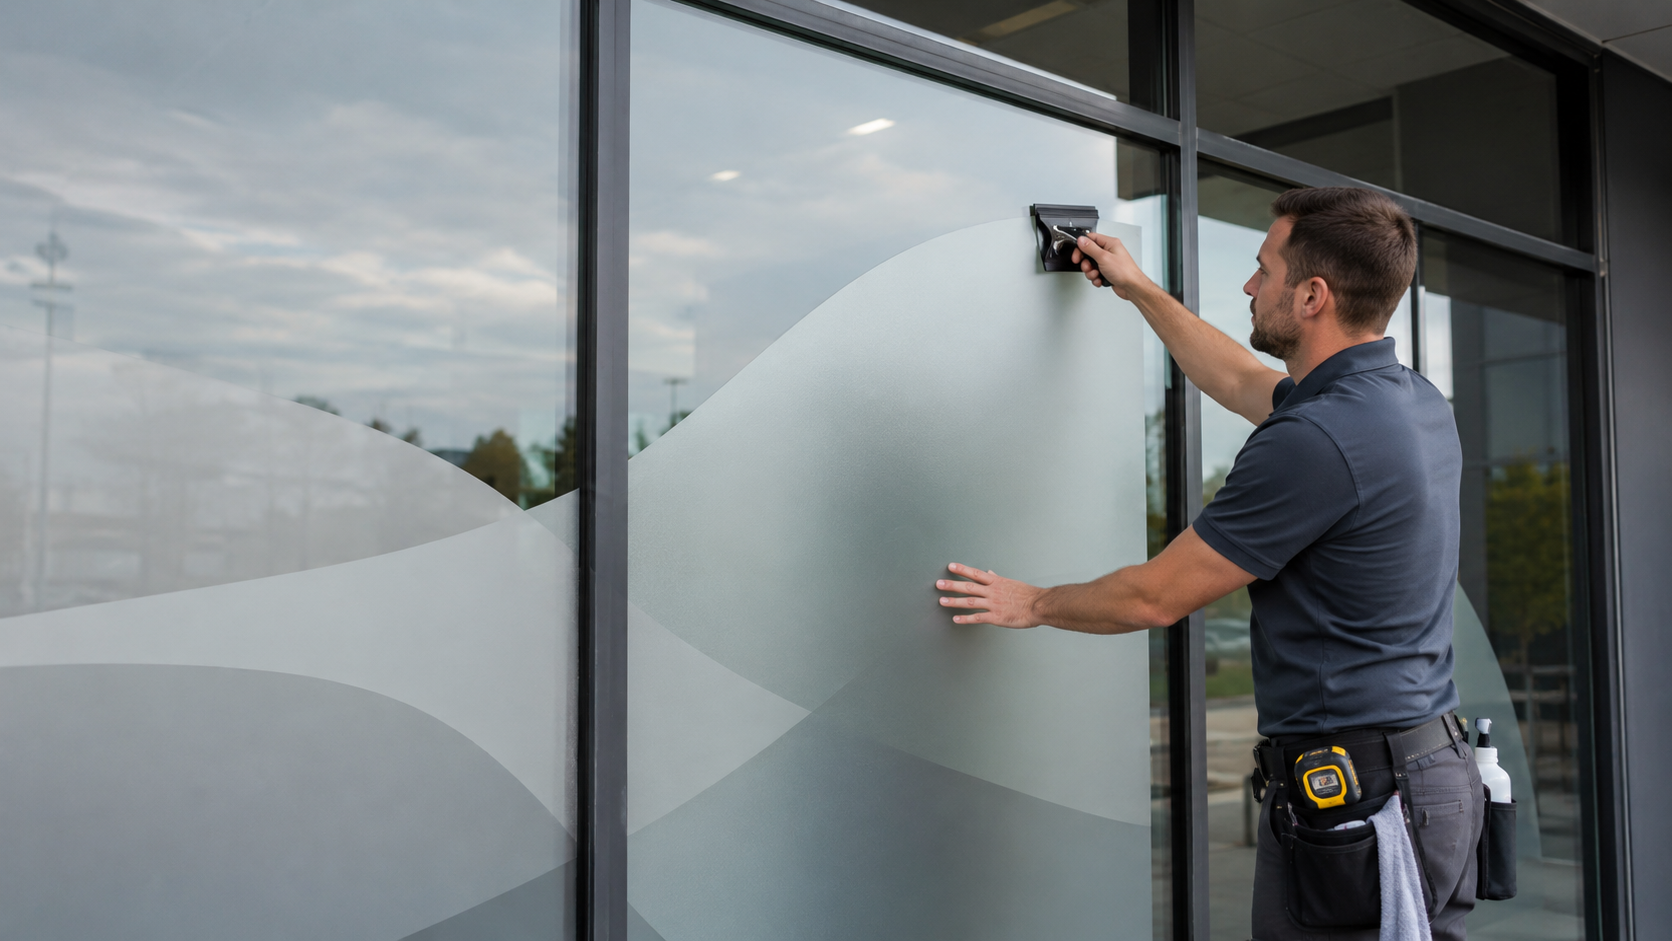
Applying Window Graphics: Step-by-Step Guide
Installing graphics on windows the right way involves careful steps from start to finish. Here’s a straightforward guide on how to install window decals to help you through the process:
-
Preparation
Properly preparing your window is important because it ensures the graphics adhere well and look smooth. This prevents problems like peeling or bubbling later on.
Clean the Window
It’s important to make sure the glass is completely clean before you start. Remove all dust, grime, and oil by using a cleaning solution and drying it off with a lint-free cloth.
Measure and Mark
Take the time to measure where the graphic will go and mark the area lightly with a pencil or chalk. This ensures the decal will be placed exactly where you want it.
-
Placement
Proper placement is essential for ensuring the graphic looks good and functions as intended without obstructing views or misaligning with your design goals.
Peel and Position
Gently peel the backing off the graphic, line it up with your marks, and place it on the glass carefully. Correct placement the first time prevents damage and the need for repositioning.
-
Application
The way you apply the graphic affects both its longevity and visual appeal, making sure it’s free from imperfections.
Squeegee Out Air Bubble
Using a squeegee, start from the centre and smooth the graphic out towards the edges. This step is important to ensure your graphics installation is smooth and bubble-free.
Trim Excess Material
If any part of the graphic extends beyond the window’s edge, trim it carefully with a razor blade or utility knife. This step keeps the edges clean and tidy.
-
Final Touches
The final inspection and adjustments ensure that every aspect of the installation is perfect, addressing any minor issues that could affect the overall quality and appearance.
Inspect and Adjust
Look over your work to find any bubbles or misaligned areas. If needed, you can use a heat gun to gently warm the vinyl graphics, making them more pliable for final adjustments.
By carefully following these steps, you can ensure that your graphics are applied correctly. This will enhance the aesthetics and functionality of your space with a professional finish.
Removing and Replacing Graphics From Windows
If you want to remove and replace old graphics, it’s important to do it carefully to avoid damaging the glass or leaving sticky bits behind. Here’s an easy guide to help you:
Removing Old Graphics
- Start by gently heating the old graphic with a heat gun. The heat will loosen the adhesive, so you can peel it off more easily. Begin at one corner and slowly pull the graphic away from the glass. Take your time so it doesn’t rip or leave pieces behind.
- After you remove the graphic, make sure to clean the glass well. This will get rid of any leftover sticky glue or dust and make sure your new graphic sticks properly.
Replacing with New Graphics
- Choose the right type of graphic for your needs. For example, if you’re replacing commercial window graphics for your business, think about things like how much sunlight the window gets, if you need privacy, or if the graphic needs to be easy to remove later.
- Follow the same steps as before to apply your new graphics. First, clean the glass, then carefully measure and position the graphic where you want it. Use a squeegee to smooth out any air bubbles and make sure everything looks neat.
Maintenance and Preservation of Window Graphics
To keep your graphics looking great for a long time, it’s important to take care of them. Proper maintenance helps extend the life of your graphics and keeps them looking fresh and vibrant.
Here’s how you can maintain them:
Clean Regularly: Clean your graphics often to keep them looking good. Use a soft cloth and a mild detergent to gently clean them. Make sure not to use harsh chemicals or rough cloths, as they can damage the graphics or cause them to peel.
Inspect for Damage: It’s a good idea to regularly check the graphics for any signs of wear or peeling, especially around the edges. If you spot any problems early on, you can fix them before they get worse. Catching small issues early can help you avoid needing to replace the graphics too soon.
Frequently Asked Questions (FAQs)
1. What are some helpful window decal installation tips?
Clean the window well before applying the decal. Measure and mark where you want it. Peel off the backing, place the decal, and use a squeegee to smooth out any air bubbles.
2. How do I choose the right window graphic sizing and placement?
Measure your window carefully to pick the right size. Decide where you want the graphic—centred or on one side—based on what looks best or how visible you want it to be.
3. Can I create DIY window graphics at home?
Yes, you can! You can buy materials like vinyl sheets or adhesive film and make your own designs. Just remember if you’re not sure about doing it yourself, it’s a good idea to get professional help for a better result.
4. How do I choose the best colour choices in graphics?
Pick colours that match your space or brand. Bright colours grab attention, while soft colours give a more subtle look. Make sure the colours stand out well against the window background.
5. What’s the difference between window decals vs. clings?
Window decals stick to the glass with adhesive and are harder to remove. Window clings stick with static, so they can be easily removed and reused without leaving a sticky residue.
Visit Window n’ Wall Graphics
Ready to give your windows a fresh new look with amazing graphics? Visit Window n’ Wall Graphics for expert advice, custom designs, and professional installation services. Whether you need privacy, decoration, or branding, we can help you create the perfect graphics to make your space better.
